Manage instances and revisions
ITSM Designer - Combodo's customers only
This view aims at providing you with project management tools.
If you are not already familiar with the concepts of Revision and Instance, please take some time to read and understand the fundamental principles of the ITSM Designer.
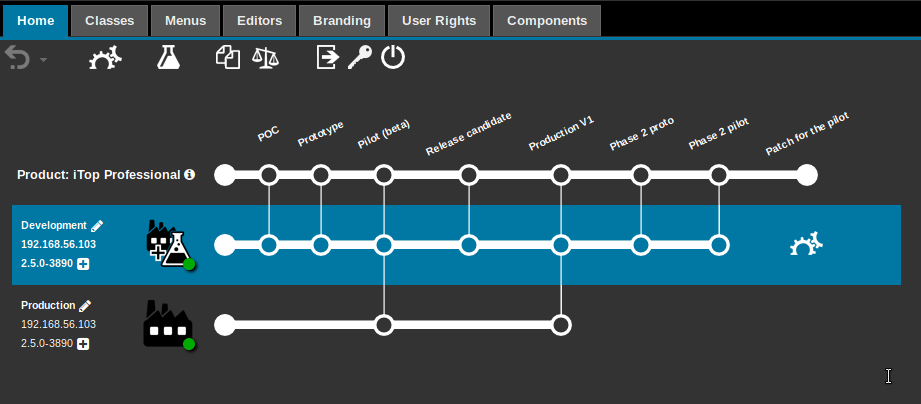
Let us comment the example shown above:
-
The instance highlighted in blue is the Active instance. The active instance is the target for some of the buttons of the toolbar. This instance is active because you have entered the designer coming from that instance.
-
All of the revisions have been moved in production on the Development system (the active one). On the other hand, the production system has been updated twice, and is currently running the revision “Production V1”.
Toolbar
| Icon | In short | More information |
|---|---|---|
| Undo | Click on the button to undo the previous operation, or click on the triangle to select the operations to undo. The button is grayed in case undoing is not allowed (e.g. after a move to production) | |
| Move to production | Push the latest revision to the active instance
(highlighted in blue). You will be prompted to enter a comment,
then to confirm the operation. This button is equivalent to the
button |
|
| Test | Test the latest revision to the active instance. This button is shown only if the active instance has been given the role 'Production and Test' | |
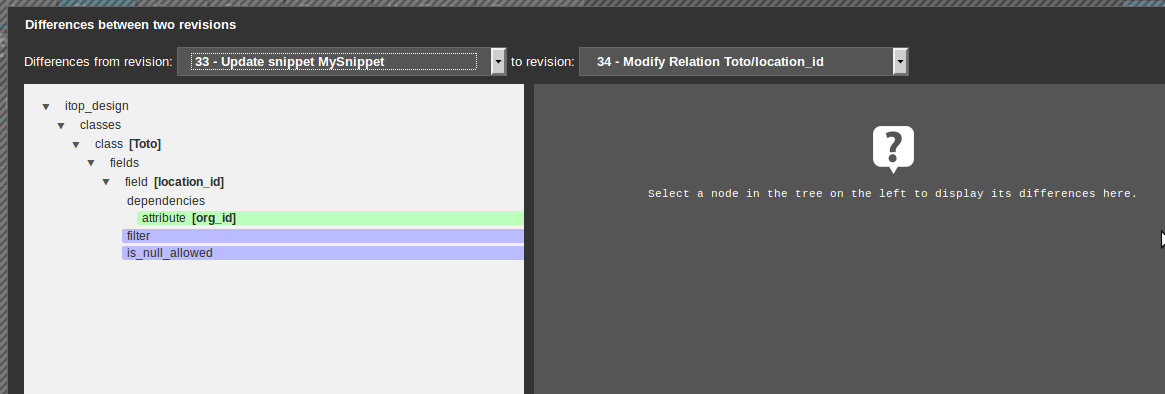
| Diff | Show the differences (in raw XML) between two revisions of your design. | |
| Clone | Create a copy of a past revision and make it the current revision. Available only to the Power users profile. | |
| Exit | Exit the designer and go back to the active instance. You remain logged onto the designer so that going back and forth between your instance and the designer does not prompt you anytime for your credentials. | |
| Change password | Opens a window in which you can change your Combodo customer password. | |
| Logoff | Exit the designer |
Revision labelling
By default, a revision has a label formed with a number: Revision 123456. That number is a unique identifier and might help in troubleshooting any issue but it is of no help for a normal usage.
Clicking on the current label opens a dialog box. In that dialog box, you can enter a new label, or edit the current one.
If you also enter a comment, this comment will be displayed when moving the mouse over the label, as shown hereafter:
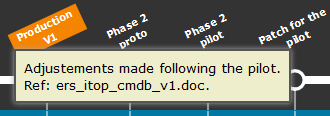
A comment can be removed. On the other hand, once a label has been given, you can modify it but it is mandatory to enter a non empty string.
Differences between revisions
Once you have done several modifications, the schema will show a timeline with several revisions.
Clicking on the ![]() button, displays a popup dialog showing the XML alterations between
the two selected revisions.
button, displays a popup dialog showing the XML alterations between
the two selected revisions.
Select the revisions you want to compare: 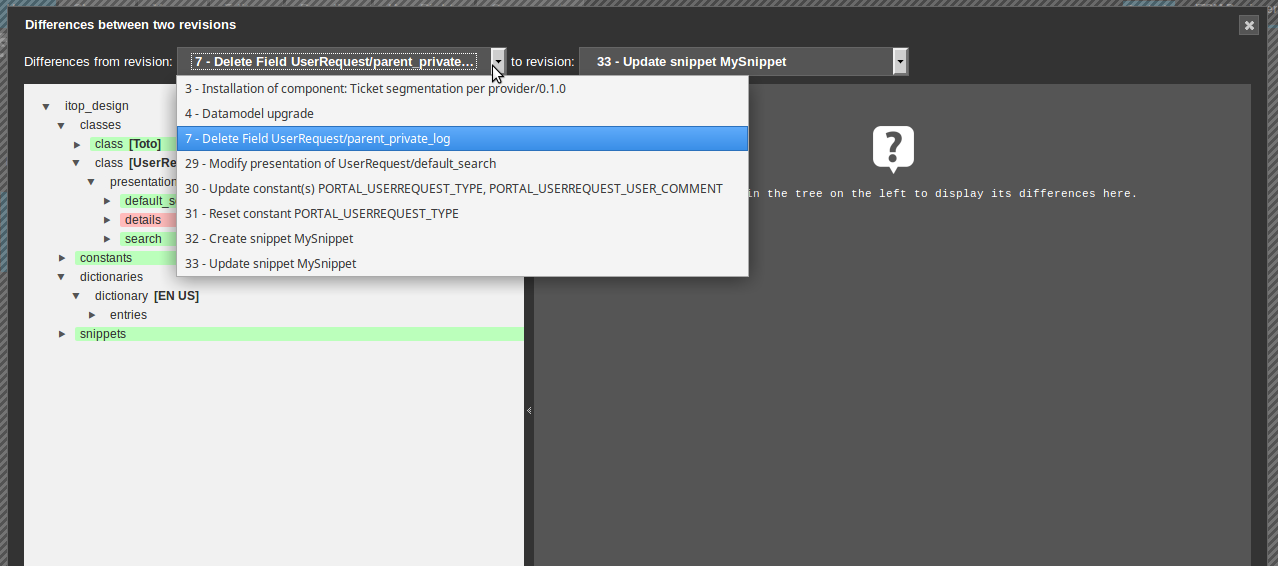
-
green color means adding a tag (or a branch)
-
blue color means modification of a tag (or a branch)
-
red color means removal of a tag (or a branch)
Click on a particular displayed tag (colored or not) to get the details of the change in the right pane
Colored tag
None colored tag
Managing Instances
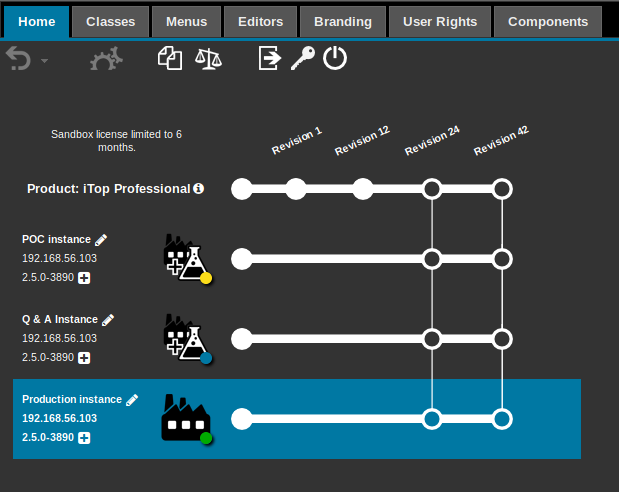
The homepage shows, for each instance connected to the Designer, a colored bullet telling when this instance last connected to the ITSM Designer
-
Grey: we don't know, so for sure older than November 2018
-
Yellow: last connection occurred more than 6 months ago
-
Blue: between 6 month and one month
-
Green: less than a month ago
Instance labelling
By default, an instance has the label Untitled instance.
Clicking on the current label opens a dialog box. In that dialog box, you can:
-
enter a new label, or edit the current one;
-
modify the role of the instance (see Managing instances)
-
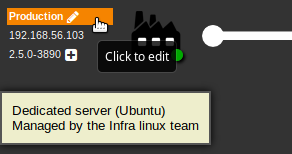
enter a description: will be displayed when moving the mouse over the label, as shown hereafter:
Clicking on the highlighted area next to the pencil icon displays the following dialog box:
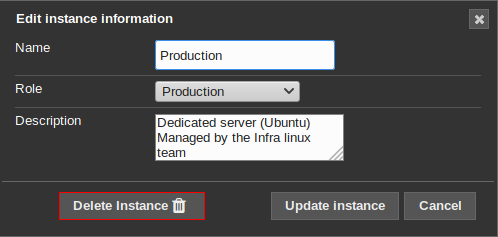
A description can be removed. On the other hand, once a label has been given, you can modify it but it is mandatory to enter a non empty string.
Instance upgrading
At the bottom of the instance description area, the exact product version of the instance is given:

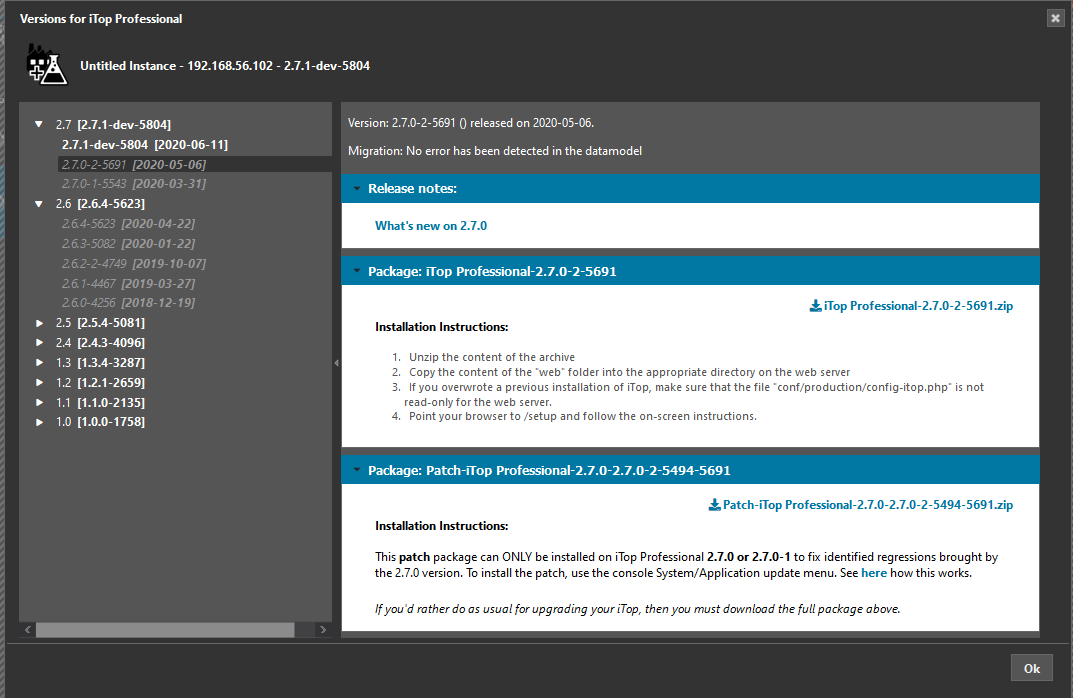
Clicking on the version shows the Upgrade dialog box. The Upgrade dialog box allows you to download another version of the product. The download will NOT install the product upgrade. You will have to follow the iTop upgrade instructions given in the Upgrade dialog.
-
Select a version on the left pane of the pop-up window
-
Download the package on the right pane
-
You can select the full package for a new/standard installation
-
Or if your iTop is on that branch already, download the patch version and install it using the console
System/Application updatemenu, this is faster and safer, especially if you are not a system expert.
-
Move to production
Moving a revision into production always applies to the active instance.
There are two ways to update the active instance:
-
Click on the toolbar button
 to apply the very
latest revision
 -
Click on the instance button
 to apply a specific
revision
Here is a variant of the view shown on top of the current chapter, but this time the active instance is the Production system.

Moving into production opens a dialog box in which you can enter a comment. This comment will be shown in a tooltip when moving your mouse over the intersection of the instance and revision:


