Approval process automation
- name:
- Approval process automation
- description:
- Control your approval process with predefined rules based on service catalog
- version:
- 1.3.5
- release:
- 2017-11-14
- itop-version-min:
- 2.2.0
- dependencies:
- none
- download:
- https://store.itophub.io/en_US/products/combodo-approval-process-automation
- code:
- combodo-approval-process-automation
- alternate-name:
- Approval Extended
For iTop without Enhanced Portal, use 1.2.2 or better this one
For iTop with Enhanced Portal use an higher version
This module provides the capability to handle a two levels approval process for a user request, with several approvers in parallel on each level.
Features
-
Automated, rule based, approval mechanism.
-
Supports passive or active approval and configurable timeout delay.
-
Two levels of approbation with several approvers in parallel at each level.
-
Approvers can approve or reject a request in one click from an email (no need to have an iTop account) or multiple requests pending for their approval either on the console.
-
Graphical view of the approval status on each ticket.
-
Configurable approval email message, with multi-language capabilities.
Revision history
| Date | Version | Description |
|---|---|---|
| 2017-11-15 | 1.3.5 | Bug fix: Tooltips not showing for all comments when several answers of the same user (Typically rejected then accepted an user request) |
| 2017-09-27 | 1.3.4 | fix 2.4 compatibility issue |
| 2017-09-01 | 1.3.3 | - Comments recorded in the log: loosing carriage returns - Fix Check/Uncheck All on portal summary page - Do not skip level 2 if there is no approver on level 1 - Missing index, slowing down the display of a ticket - dishardcoded menu group “Helpdesk” position - Fix corrupted coverage windows when edited from a browser having a timezone different from the timezone of iTop |
| 2016-11-30 | 1.3.2 | Approval Emails configurable by the mean of triggers/actions with placeholders - Select the step ending condition in each step of the approval rule - Do not ask several times an approval to the same person |
| 2016-08-09 | 1.2.1 | - XML-based implementation in order to ease some customizations - include a library for the support of approvals in the enhanced customer portal (requires further customizations though) |
| 2016-07-11 | 1.2.0 | Now requires iTop 2.2.0! - Bug fix: “Portal users” redirected to the customer portal when trying to approve - Date and time correctly formatted (if iTop version >= 2.3.0) - Hide the shortcut buttons (Assign) on the ticket creation page, ONLY IF there are some approval rules in the DB - Prevent overflow of interval to the next day when dragging/dropping intervals in the calendar |
| 2015-09-30 | 1.1.3 | Disable the standard attributes UserRequest::approver_id and approver_email, as they do not make sense when this module is installed. Removed the “plus” button from the Approval Rule edition form, to workaround a bug in the coverage windows creation form (when shown as a dialog, requires a fix in the core of iTop, related to the component “SLA With Coverage Windows” version >=2.1.0, or the module “combodo-coverage-windows-computation>=2.0.0) |
| 2014-12-18 | 1.1.2 | Manually send a reminder ; Support of several executions on the same ticket (works retroactively with data recorded prior to this version) ; Record something into the log even if the comment is left empty (was already done when bypassing the process) ; If an approver already gave her answer the approve/reject menus must be hidden ; If a user bypasses the process, and if her account has a contact defined, then the identifier of the user (shown in the header of the new log entry) must be the contact friendly name (not the user login) ; Changed the misleading message “is now complete with failure” into “is now complete with result REJECTED” ; Prevent the CRON from creating one CMDBChange record per minute ; Fixed typos in the french dictionary ; Changed the module name (internal) |
| 2014-04-24 | 1.0.3 | Better error reporting when an email address is wrong or missing. In particular when the module has just been installed, the configuration entry sender_email is left empty and this produces a scary error message when the email transport is SMTP |
| 2014-03-07 | 1.0.2 | Integration of the German translation (thanks to ITOMIG GmbH) |
| 2014-03-05 | 1.0.1 | First release (fixes a bug found the prototype: always approve on timeout, whatever the setting in the approval rule) |
Requirements
Requires iTop 2.2.0.
Installation
Download the package and expand only the 3 folders
approval-base, combodo-approval-extended,
combodo-sla-computation into the
“extensions” directory of iTop.For iTop 2.4.0 and higher, you should use a more recent version of this extension. If you still want this one, apply the Standard installation process.
Configuration
email_sender and configure
trigger/action to ensure “Approval eMails”
delivery.The following settings are available to configure the module:
| Module | Parameter | Type | Description | Default Value |
|---|---|---|---|---|
| approval-base | email_sender | string | Sender eMail address, as seen in the approval email. If left blank, sending the email will fail. | |
| approval-base | email_reply_to | string | Default “reply to” eMail address for the approval email. | (optional) defaults to email_sender |
| approval-base | comment_attcode | string | Attribute into which the user comments will be reported. Can be a case log or text. The comments are all aggregated. Note: the comment can also be viewed as a tooltip. | (optional) |
| approval-base | list_last_first | boolean | In case several executions occur, drives the order in which the results of the executions are displayed (vertically). | false |
| approval-base | enable_reminder | boolean | Enable the feature “send a reminder”. | true |
| approval-extended | enable-admin-abort | boolean | Allow defined profiles to bypass the approval process. Profiles allowed to bypass the process are defined in the variable bypass_profiles. | true |
| approval-extended | target_state | string | state that may trigger the approval process | default “new”. Warning: the transition wait_for_approval has to be defined for this state. |
| approval-extended | bypass_profiles | string | CSV list of profiles. Having any of the given profiles is sufficient to be allowed to bypass approval processes. Set to an empty string to deny the feature to anybody. | Administrator, Service Manager |
| approval-extended | reuse_previous_answers | boolean | If a person is approver at both level then his level 1 decision is reused at level 2 | true |
The following standard settings might be of interest when setting up the approval feature:
-
email_asynchronous
-
email_transport
Notification
New in version 1.3.2: Email notification is based on Trigger/Action.
A default trigger is created at installation  as well
as 3 default actions with body in English, French and German.

You can of course edit this message to make it yours, here is the english default version for example of possible placeholders:
$approver→html(friendlyname)$,Please take some time to approve or reject ticket
$this→html(ref)$Caller:
$this→html(caller_id_friendlyname)$Title:
$this→html(title)$Service:
$this→html(service_name)$Service subcategory:
$this→html(servicesubcategory_name)$Description:
$this→html(description)$
Additional information:
$this→html(service_details)$
$approval_link$
 You must
create the linkage between trigger and action of
the language you want to use.
If you need to send different notification depending on the organization of the caller, the service, the service family, or any data available on the Ticket, this can be done by creating multiple trigger/action couples, using a filter on the Trigger.
Usage
Cinematics
When a User Request is entering the state new, the approval engine verifies if there is an approval rule defined for the corresponding service subcategory. If yes, then the state of the user request is set to wait for approval and a notification is sent to the approvers defined in the approval rule. Only the approvers corresponding to the first level are notified. Once the request is approved, and if a second level has been defined, then the second level approvers are notified. Should the approval be rejected (by an approver, or on timeout), then the process finishes in any case.
The email contains a web link to display the web page to approve or reject the request.
The approvers will have a delay defined in the approval rule to give their answers. This delay takes into account the coverage window defined in the approval rule.
Once the approval delay has expired, the approval process terminates. The result (approved or rejected) is then taken in the property Automatically approved if no answer at Level 1/2 of the approval rule.
The User Request will then continue its way through its lifecycle, depending on the approval status: rejected or approved.
Create approval rules
From the Service Management menu, click on Approval rules:
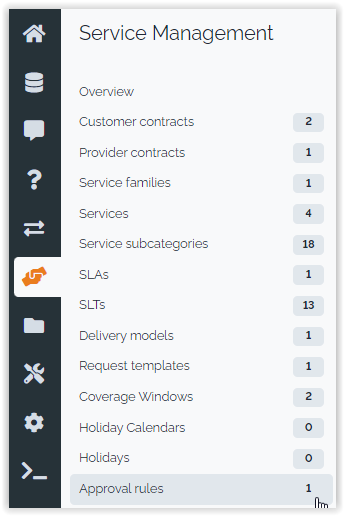
The pages show a list of already defined approval rules. Click on the button “new” to create a new one:
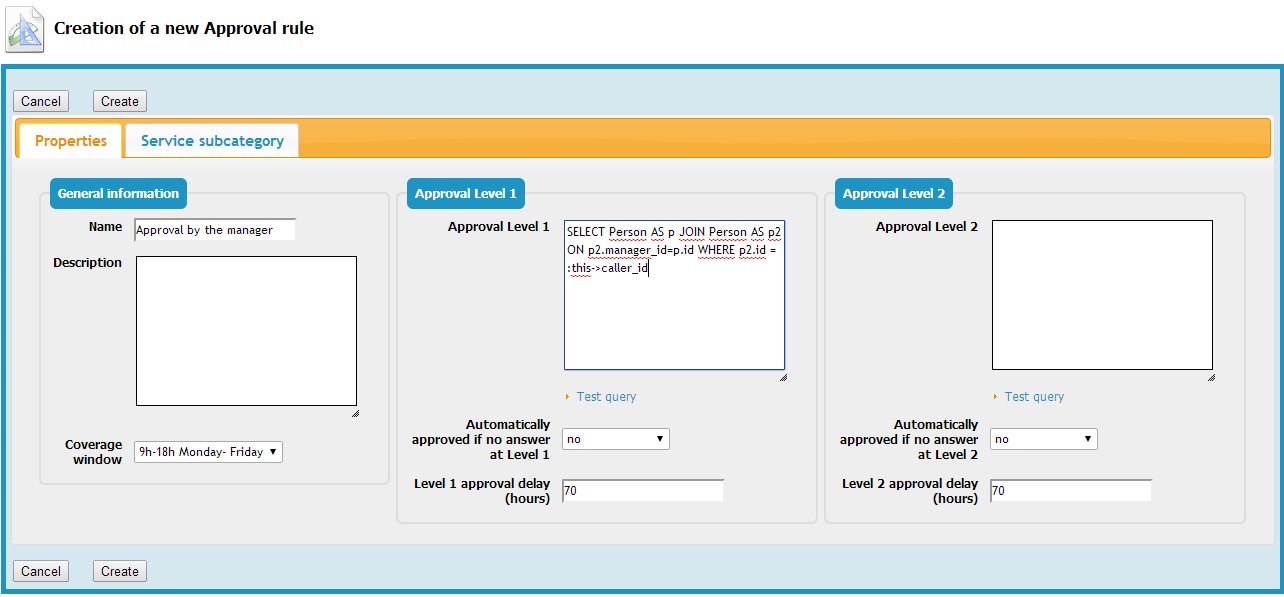
An approval rule is identifier by it name. The coverage window is used to compute the approval delay.
The fields Approval level 1 and 2 define, via
an OQL query, the list of approvers for each approval level. These
queries must return elements having an email attribute (e.g. Person
or Team). It is possible to use the place holders
:this->attribute that make reference to the
attributes of the user request.
For instance :this->caller_id for the caller,
:this->service_id for the service … All attributes
defined in the data model for a service request can be used.
New status.The issue will occur if the Requestor has
allowed
organizations
but the approver does not belong to one of
those organizationsThe field Automatically approved if no answer determines if the request will be approved or rejected if there is no answer after the defined delay.
The field approval delay (hours) defines the delay in hours for each level of approval, only hours within the coverage windows are counted..
The field approval ending is useful with multiple approvers to determine, how to behave with multiple actions:
-
ends on first approve: All must reject for Request to be rejected.-
Multiple rejected then one approved ⇒ ends and approved
-
multiple rejects but not all then delay expired ⇒ ends and “reject or approved” depends on field
Automatically
approved if no answer
-
-
ends on first rejectprevious default behavior: all must approved.-
Multiple approval then one reject ⇒ ends and reject
-
multiple approvals but not all then delay expired ⇒ ends and “reject or approved” depends on field
Automatically
approved if no answer
-
-
ends on first reply= first to act is the decision maker.
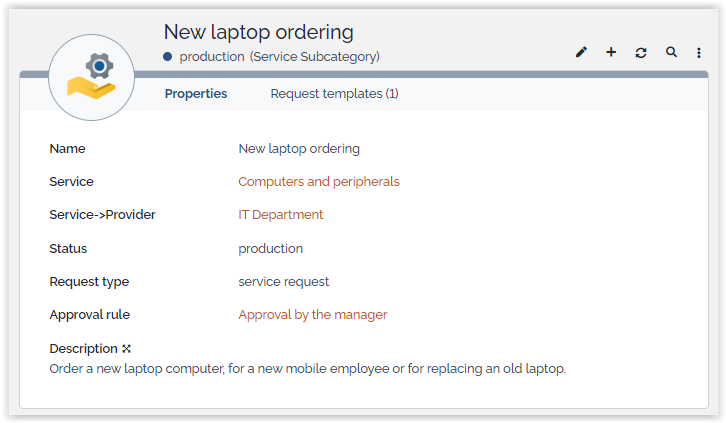
Once the approval rule has been defined, you can assign it to a service subcategory, either from the approval rule itself (tab Service subcategory) or from the service subcategory:
Approving process
Approver with an iTop login can connect anytime and check if
they have Requests pending their approval. From the Helpdesk menu,
click on Ongoing approvals: 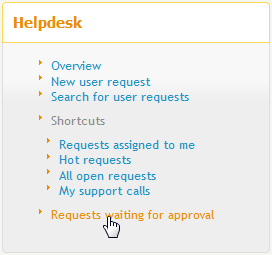
The page shows a list of the User Requests having an approval
process running, and for which your approval is being requested:

Approver without iTop login, can still approve or reject Request, but they must have received the notification for this. The email provided link allows him to approve or reject without iTop login.
If the approver has an iTop login then the email provided link
points him to iTop (Console or Portal depending on his access). In
that case, the link provided in the email can only be used with the
approver iTop login ==== Approve or reject ==== From the user
request, open the Other actions menu and select
Approve or Reject: 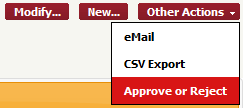 The approval form is
displayed:
 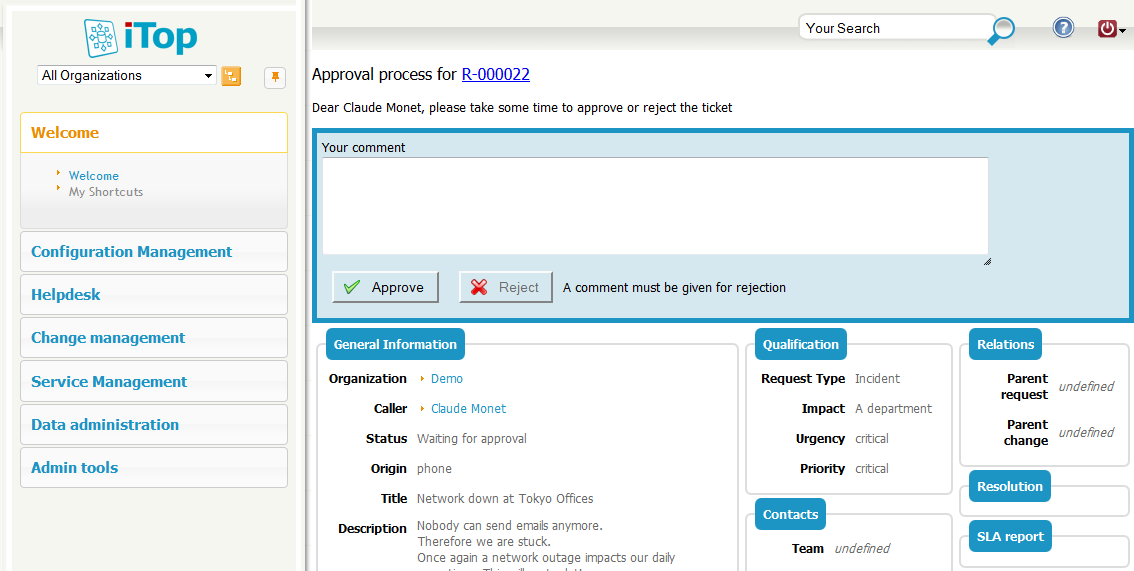 After the
reply has been given, you are redirected to the user request and a
banner reminds you the outcome of your reply.
 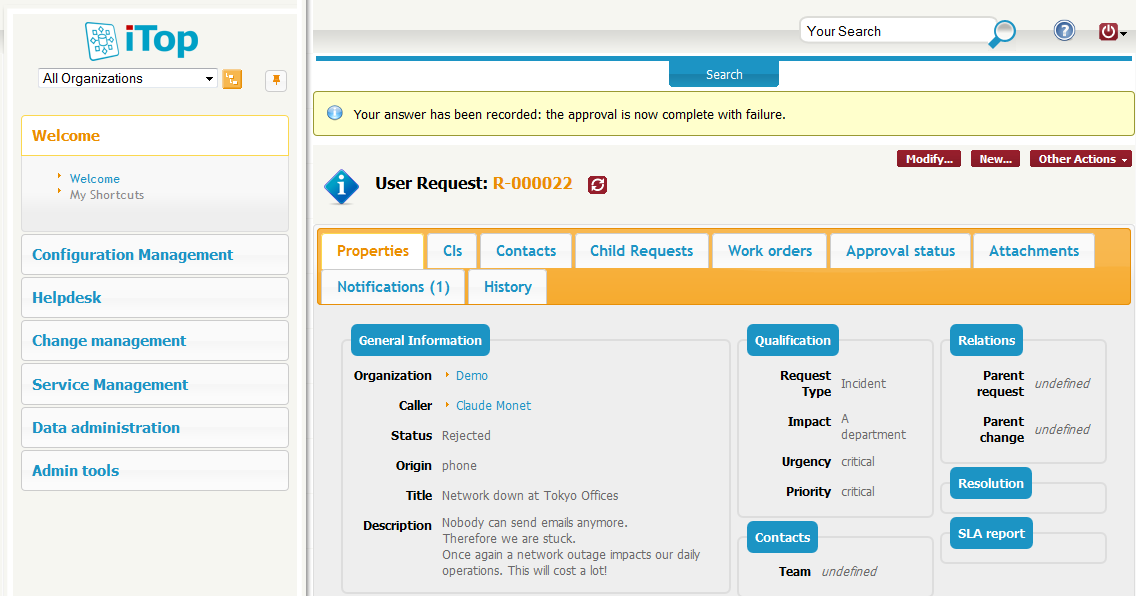 ==== Bypass
the approval process ==== If you are an administrator, and if the
setup allows it, then you have a menu to bypass the process:
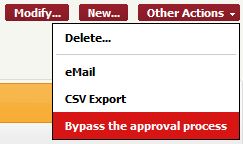 The approval form is
then a little different than the standard reply form: it reminds
you that bypassing the process is a little different.
  <note>If you are both an approver and allowed to bypass the
process, then both menus are allowed. Using one or the other will
just change the way the approval process result gets recorded and
further displayed in the status tab.</note> ==== Status ====
As soon as a user request has been through an approval process, the
tab Approval status shows detailed information
about the ongoing or terminated approval.
 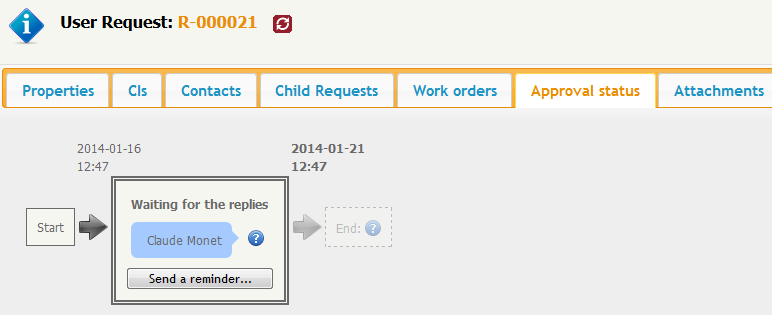 In the above example, the deadline is displayed
in bold: 21st of january at 12:47. Click on the button “send a
reminder” to send a new message to the approver (confirmation
required). This feature can be disabled by setting the
parameter enable_reminder to false. After the reply has
been given, the status appears in clear:
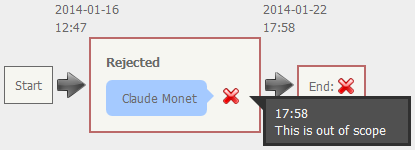
 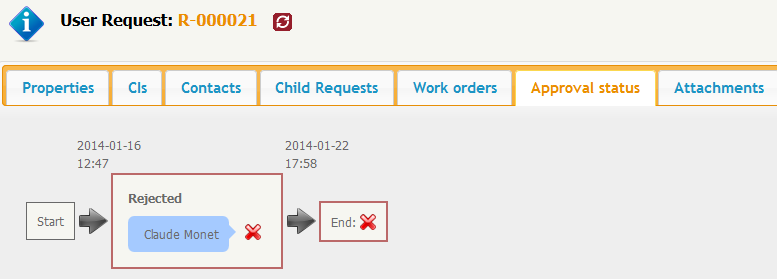 Move your mouse over the image next to the
approver's name, and you will get the date of the answer and her
comment if any has been given:
  <note>The status
will be entirely reset anytime the user request enters the state
“waiting for approval”.</note>

