User request management (Service Desk) Module
There are two alternatives for managing user requests in iTop. You can choose to install one of the two following modules:
-
Simple Ticket Management
-
User Request Management ITIL V3
The Simple Ticket Management module provides a simplified ticketing system. It is used to keep track of end-users requests. There are two types of request:
-
Incidents are used to track unexpected issues that have an impact on the delivered services.
-
Service requests are used to request new services or features like installing a new PC, creating a new email address.
This module manages both types of requests in a single type of ticket. Incidents and service requests will follow the same workflow. This allows agent to easily manage any kind of ticket and reclassify a request without having to create a new one.
The User Request ITIL V3 module focuses on service requests.
Whatever module you choose, a user request can be created via the customer portal or directly in iTop. The support agent can then modify and communicate with the customer via a journal called “Public log.” He can also communicate with internal teams within his company through a journal called “Private log”.
A customer user will see only the public log. The private log cannot be viewed from the portal.
A user request is controled by a workflow in order to make sure it is managed according to a defined process. Only authorized users can manage a user request and change its status.
A user request can be linked to a parent problem, or a parent change. In case you have installed the User Request ITIL V3 module, your request can be linked to a parent incident.
It is also possible to regroup user requests under a single user request.
The overview dashboard allows agents and managers to monitor the helpdesk activity.

User Request
 User request are used
to document all the request submitted by users
User request are used
to document all the request submitted by users
User Request Properties
| Name | Type | Mandatory? |
|---|---|---|
| Organization | Foreign key to a(n) Organization | Yes |
| Caller | Foreign key to a(n) Person | Yes |
| Status | Possible values: Approved, Assigned, Closed, Dispatched, Escalated TTO, Escalated TTR, New, Pending, Redispatched, Rejected, Resolved, Waiting for approval | Yes |
| Origin | Possible values: mail, phone, portal | No |
| Title | Alphanumeric string | Yes |
| Description | Multiline character string | Yes |
| Service | Foreign key to a(n) Service | No |
| Service subcategory | Foreign key to a(n) Service Subcategory | No |
| Hot Flag | Possible values: No, Yes | No |
| Hot reason | Alphanumeric string | No |
| Pending reason | Multiline character string | No |
| Request Type | Possible values: Service request | No |
| Impact | Possible values: A department, A service, A person | Yes |
| Urgency | Possible values: critical, high, medium, low | Yes |
| Priority | Possible values: critical, high, medium, low | Yes |
| Team | Foreign key to a(n) Team | No |
| Agent | Foreign key to a(n) Person | No |
| Approver | Foreign key to a(n) Person | No |
| Start date | Date and time (year-month-day hh:mm:ss) | No |
| Last update | Date and time (year-month-day hh:mm:ss) | No |
| Assignment date | Date and time (year-month-day hh:mm:ss) | No |
| TTO Deadline | Core:AttributeStopWatch+ (100_deadline) | No |
| TTR Deadline | Core:AttributeStopWatch+ (100_deadline) | No |
| Last pending date | Date and time (year-month-day hh:mm:ss) | No |
| Resolution date | Date and time (year-month-day hh:mm:ss) | No |
| Close date | Date and time (year-month-day hh:mm:ss) | No |
| Parent request | Foreign key to a(n) User Request | No |
| Parent incident | Foreign key to a(n) Incident | No |
| Parent change | Foreign key to a(n) Change | No |
| Resolution code | Possible values: assistance, bug fixed, hardware repair, other, software patch, system update, training | No |
| Solution | Multiline character string | No |
| Resolution delay | Core:AttributeDuration+ | No |
| User satisfaction | Possible values: Very satisfied, Fairly statisfied, Rather Dissatified, Very Dissatisfied | No |
| User comment | Multiline character string | No |
| SLA tto passed | Core:AttributeStopWatch+ (100_passed) | No |
| SLA tto over | Core:AttributeStopWatch+ (100_overrun) | No |
| SLA ttr passed | Core:AttributeStopWatch+ (100_passed) | No |
| SLA ttr over | Core:AttributeStopWatch+ (100_overrun) | No |
Tabs
| Tab | Description |
|---|---|
| CIs | All the configuration items impacted for this ticket |
| Contacts | All the contacts linked to this ticket |
| Child Requests | All the requests that are linked to this parent request |
| Work orders | All the work orders for this ticket |
Creating a User Request
Click on the “New user request” menu:

The following form is displayed:

Managing Public & Private Log
The public and the private log are used to keep track of all communications and activities related to a user request.
The public log is aimed at exchanging information with the requestor.
The private log is the preferred way for keeping track of the investigations or operations: copy/paste of command line results, summary of communications with a provider, etc.

Each entry in the public or private log is tracked with the name of the user who updated it and when it was done. It cannot be modified nor deleted.
The public log is visible from the customer portal.
If enabled by your administrator, the reply made in the public log will be sent back to the caller:

You can save time by using precanned replies for the most common questions.
Selecting a precanned reply
The agent clicks on the “Precanned replies…” button to select a
Precanned Reply from the list: 
She can use the search criteria at the top to filter the list.
When clicking “Ok”, the answer is written into the case log field. It is still possible to edit the answer. Attachments (if any) to the Precanned reply are added to the answer (the count next to the paper clip icon is increased accordingly).
Creating precanned replies
Use the menus under “Service Management” to create and maintain your precanned replies and their categories:

The form for creating a new Precanned reply looks as follows:

The “Body” field contains the text that will be added into the case log of the ticket when using this precanned replies. If you have configured the attachments to allow them on Precanned Replies, you can add attachments to the Precanned Reply using the “Attachments” tab.
Managing impacted CIs and Contacts
When a user request is edited, the agent can specify which configuration items (CIs) or contacts are related to this request via the tabs “CIs” and “Contacts”. The objects manually added to the ticket are to be flagged as “Added manually” (which is the default).
When saving the ticket, the impact analysis engine automatically adds to this list all the other CIs (and Contacts) impacted by the original CIs. The “impact” computation is based on rules defined in the iTop data model. The additional objects resulting from this computation are also linked to the ticket and flagged as “Computed” (to differentiate them from the original objects marked as “Added manually”).
The impact rules of each type of CI are described in the Configuration management module.

Dependencies with the service catalog
The Helpdesk module is linked to the service catalog in order to:
-
define which service and service subcategories can be selected for a given customer
-
define to which team a user request can be assigned
-
compute time to own (TTO) and time to resolve (TTR) deadlines
The list of services displays only the service that have been purchased by the selected customer via a customer contract. The list of service subcategories displays only the sub categories corresponding to the selected service and the selected request type.
The following picture describes the relationships between the service catalog elements and user requests.

Assigning a user request to a team and agent
The list of teams to which you can assign a user request is defined by the delivery model of the corresponding customer. When creating a user request, the agent has to select the customer organization, then the list of teams is strictly limited to the teams defined for this customer. If a team is missing, the delivery model of the customer must be updated to reflect this need. See More about Delivery model for more information
The following picture describes the relationships between the delivery model and user requests.

Automated priority computation
The priority is computed automatically. This computation depends on the impact and the urgency of the user request. The following matrix describes how the priority is computed:

Deadline computation
Presentation
To meet service agreements with customers, iTop automatically computes time to own (TTO) and time to resolve (TTR) deadlines. These deadlines depend on the service level agreements defined in the customer contracts. Deadline calculation can either assume a 24*7 service coverage, or be based on weekly based coverage windows and holidays.
The measured TTO is the time cumulated while the user request is not assigned. When the TTO deadline is passed, the ticket status is automatically changed to “Escalated TTO”.
The measured TTR is the time cumulated while the user request is neither pending nor resolved. When the TTR deadline is passed, the ticket status is automatically changed to “Escalated TTR”.
Calculation
The computation of the deadlines depends on:
-
The service level agreement defined in the customer contract for the selected service
-
The priority of the user request
-
The type of request
These are defined in the service level targets (SLT) corresponding to the service level agreement (SLA).
In addition to this criteria, and if a coverage window has been defined and selected for the couple customer contract / selected service, then the deadline will also take into account the working hours (and eventually holidays).
Cinematics
The deadlines computation is performed each time a modification is made on the user request.
When the cumulated TTO/TTR reaches 75% of the TTO/TTR deadline, then the user request is displayed in yellow. Once the deadline is passed, it becomes red.
Reporting
Once the user request is resolved, deadlines and measures are kept within the user request. This can be used both for analyzing process issues and for reporting purposes.
The following information are recorded:
-
TTO deadline (date and time)
-
TTO cumulated (seconds)
-
TTO passed (yes / no)
-
TTO overrun (seconds)
-
TTR deadline (date and time)
-
TTR cumulated (seconds)
-
TTR passed (yes / no)
-
TTR overrun (seconds)
Regrouping User Request
It is sometimes useful to regroup user requests under an incident which is the root cause of the issue. For instance when a mail server is down, you may have several end users complaining about mailbox being unavailable.
To group user requests, use the field parent incident.
If an incident ticket is parent of a user request, then each time its private and public logs are modified, iTop will automatically update the logs of the child requests. When the parent incident get resolved, iTop will automatically mark the child requests as “resolved”.
User Request Life Cycle

Depending on the status of the object, the contraints on the properties vary as shown on the table below:
| New | Assigned | Dispatched | Waiting for approval | Escalated TTO | Resolved | Pending | Escalated TTR | Redispatched | Closed | Approved | Rejected | |
|---|---|---|---|---|---|---|---|---|---|---|---|---|
| Organization | M | M | M | M | M | R/O | M | M | M | R/O | M | M |
| Caller | M | M | M | M | R/O | R/O | M | M | ||||
| Status | R/O | R/O | R/O | R/O | R/O | R/O | R/O | R/O | R/O | R/O | R/O | R/O |
| Origin | R/O | R/O | ||||||||||
| Title | R/O | R/O | ||||||||||
| Description | R/O | R/O | ||||||||||
| Service | M | R/O | ||||||||||
| Service subcategory | R/O | |||||||||||
| Hot Flag | H | H | H | H | R/O | R/O | H | H | ||||
| Hot reason | H | H | H | H | R/O | R/O | H | H | ||||
| Pending reason | H | H | H | H | H | R/O | M | H | H | R/O | H | H |
| Request Type | M | R/O | M | M | R/O | |||||||
| Impact | R/O | R/O | ||||||||||
| Urgency | R/O | R/O | ||||||||||
| Priority | R/O | R/O | R/O | R/O | R/O | R/O | R/O | R/O | R/O | R/O | R/O | R/O |
| Team | H | M | M | R/O | M | M | M | R/O | ||||
| Agent | H | M | H | H | H | R/O | M | M | H | R/O | H | H |
| Approver | H | R/O | H | R/O | R/O | R/O | R/O | R/O | H | |||
| Start date | R/O | R/O | R/O | R/O | R/O | R/O | R/O | R/O | R/O | R/O | R/O | R/O |
| Last update | R/O | R/O | R/O | R/O | R/O | R/O | R/O | R/O | R/O | R/O | R/O | R/O |
| Assignment date | H | R/O | H | H | H | R/O | R/O | R/O | R/O | R/O | H | H |
| TTO Deadline | R/O | H | R/O | R/O | R/O | H | H | H | H | H | R/O | H |
| TTR Deadline | H | R/O | H | H | H | H | H | R/O | R/O | H | H | H |
| Last pending date | H | H | H | H | H | H | R/O | H | H | H | H | H |
| Resolution date | H | H | H | H | H | R/O | H | H | H | R/O | H | H |
| Close date | H | H | H | H | H | H | H | H | H | R/O | H | H |
| Parent request | R/O | R/O | ||||||||||
| Parent change | R/O | R/O | ||||||||||
| Resolution code | H | H | H | H | H | M | H | H | H | R/O | H | H |
| Solution | H | H | H | H | H | M | H | H | H | R/O | H | H |
| Resolution delay | H | H | H | H | H | R/O | H | H | H | R/O | H | H |
| User satisfaction | H | H | H | H | H | H | H | H | H | H | H | |
| User comment | H | H | H | H | H | H | H | H | H | H | H | |
| SLA tto passed | H | R/O | H | H | H | R/O | R/O | R/O | R/O | R/O | H | H |
| SLA tto over | H | R/O | H | H | H | R/O | R/O | R/O | R/O | R/O | H | H |
| SLA ttr passed | H | H | H | H | H | R/O | H | H | H | R/O | H | H |
| SLA ttr over | H | H | H | H | H | R/O | H | H | H | R/O | H | H |
-
H: hidden
-
R/O: read-only
-
M: mandatory
Approval workflow
Cinematics
When a User Request is entering the state new, the approval engine verifies if there is an approval rule defined for the corresponding service subcategory. If yes, then the state of the user request is set to wait for approval and a notification is sent to the approvers defined in the approval rule. Only the approvers corresponding to the first level are notified. Once the request is approved, and if a second level has been defined, then the second level approvers are notified. Should the approval be rejected (by an approver, or on timeout), then the process finishes in any case.
The email contains a web link to display the web page to approve or reject the request. The approver does not need to login into iTop (the links contains that information).
The approvers will have a delay defined in the approval rule to give their answers. This delay takes into account the coverage window defined in the approval rule.
Once the approval delay has expired, the approval process terminates. The result (approved or rejected) is then taken in the property Automatically approved if no answer at Level 1/2 of the approval rule.
The User Request will then continue its way through its lifecycle, depending on the approval status: rejected or approved.
Create approval rules
From the Service Management menu, click on Approval rules:
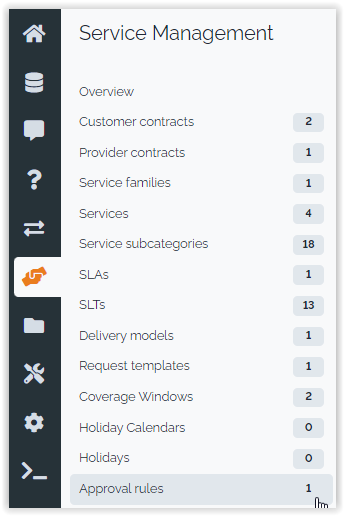
The pages show a list of already defined approval rules. Click on the button “new” to create a new one:

An approval rule is identifier by it name. The coverage window is used to compute the approval delay.
The fields “Approval level1” and “Approval level2” define, via
an OQL query, the list of approvers for each approval level. These
queries must return elements having an email attribute (e.g. Person
or Team). It is possible to use the place holders
:this->attribute that make reference to the
attributes of the user request.
For instance :this->caller_id for the caller, :this->service_id for the service … All attributes defined in the data model for a service request can be used.
The field “Automatically approved if no answer ” determines if the request will be approved or rejected if there is no answer after the defined delay.
The field “approval delay (hours)” defines the delay in hours for each level of approval.
Once the approval rule has been defined, you can assign it to a service subcategory, either from the approval rule itself (tab Service subcategory) or from the service subcategory:

My ongoing approvals
From the Helpdesk menu, click on Ongoing approvals: 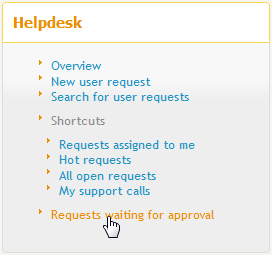
The page shows a list of the User Requests having an approval
process running, and for which your approval is being requested:

Approve or reject
From the console
From the user request, open the Other actions
menu and select Approve or Reject: 
The approval form is displayed: 
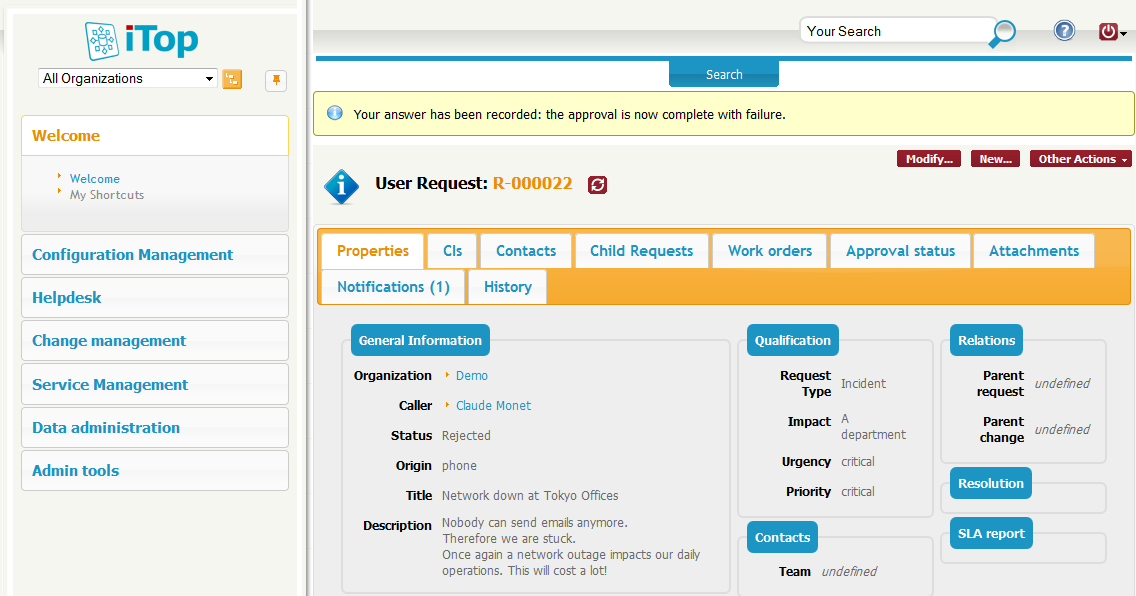
After the reply has been given, you are redirected to the user
request and a banner reminds you the outcome of your reply.
From the customer Portal
Either on the home page, or on the menu, click on
Approvals: 
The list of ongoing approvals is displayed: 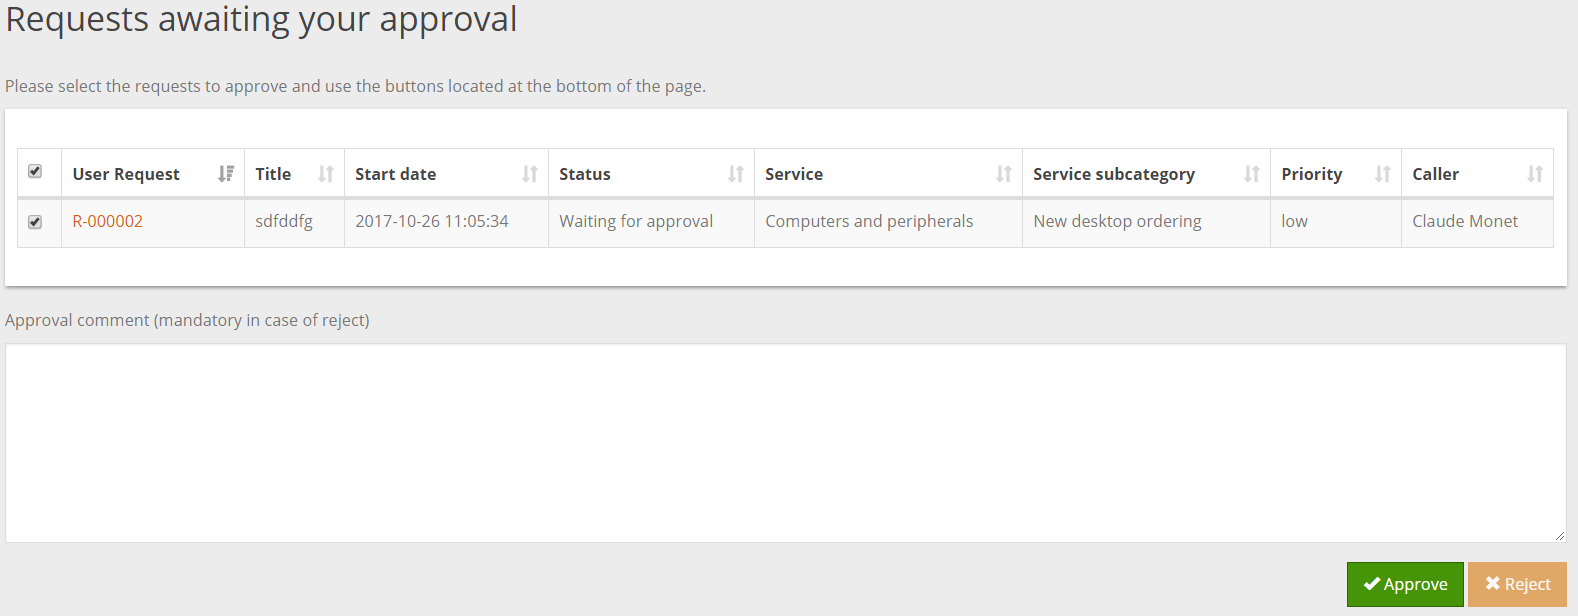
You are then prompted for confirmation: 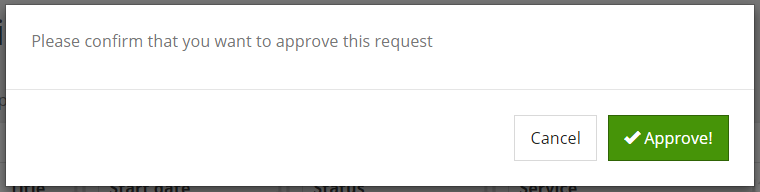
After the reply has been given, the list of remaining expected approvals is displayed again.
Bypass the approval process
If you are an administrator, and if the setup allows it, then
you have a menu to bypass the process: 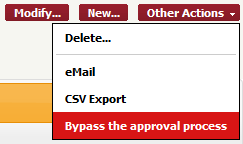
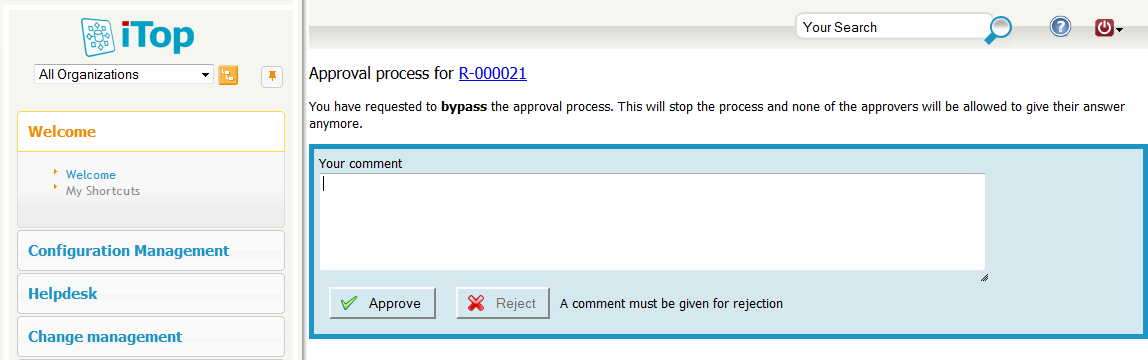
The approval form is then a little different than the standard reply form: it reminds you that bypassing the process is a little different.
Status
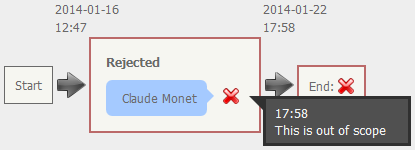
As soon as a user request has been through an approval process, the tab Approval status shows detailed information about the ongoing or terminated approval.

In the above example, the deadline is displayed in bold: 21st of january at 12:47.
After the reply has been given, the status appears in clear:

Move your mouse over the image next to the approver's name, and you will get the date of the answer and her comment if any has been given: