Reports in Spreadsheet
How to create a Spreadsheet report using an iTop query
Importing data from iTop
Administrators can store predefined queries in iTop (menu “Administration / Query Phrasebook”). These queries can then be used to create reports in Excel. A query is identified by a number. It is called in Excel using a URL provided by your iTop administrator. For example, the URL below stored in the query phrasebook, returns a list of User Request:
Then, you can use this URL query with your favorite spreadsheet application :
Reports in Excel
Without Personal Token
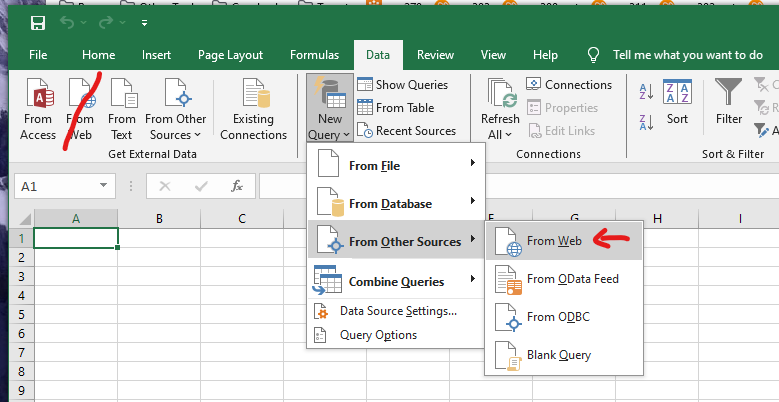
Click on the menu item “Data” / “From Web”. If you get a dialog similar to the one below (PowerQuery) this is not good.

Instead you should get a dialog similar to this:
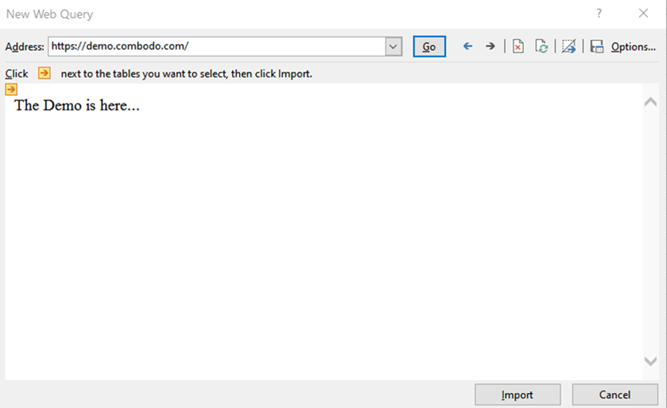
To use the old GetExternalDataFromWeb wizard,
follow these steps:
Go to the File / Options menu

Click on the “Customize Ribbon” menu on the left:
In the drop-down list at the top-left, select “Main tabs”, in the tree displayed, open the item “Data” and select the menu item “From Web”
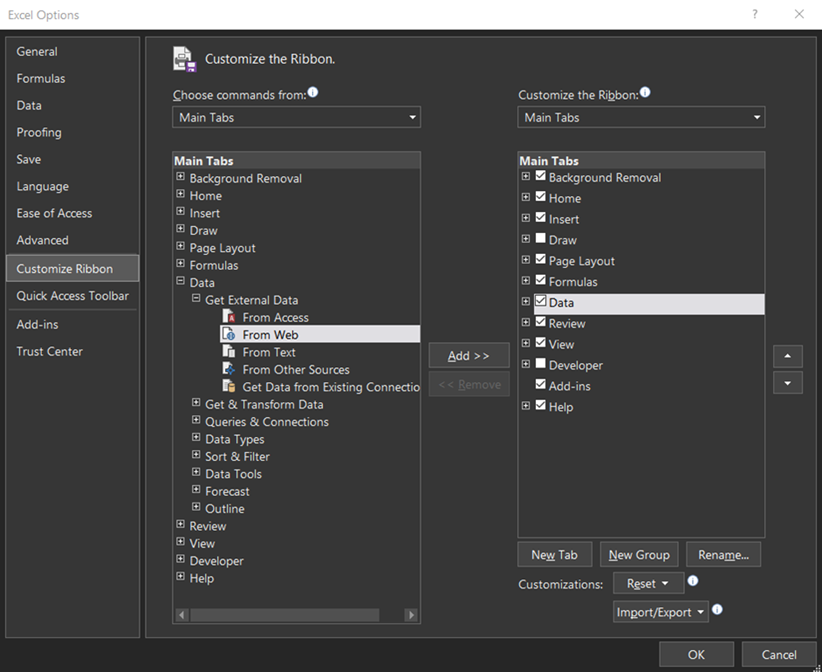
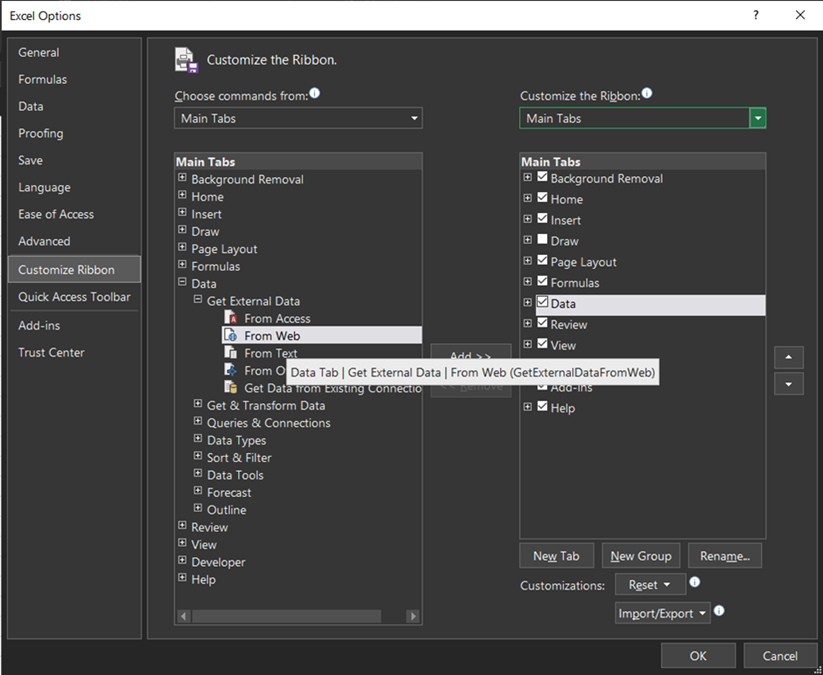
To add the command to your Ribbon you must create a new “Group” (using the button at the bottom of the dialog box). The group is named with a default name, but you can rename it if you like:
Similarly, you can rename the menu and choose an icon for it. Once your menu has been added to the ribbon, you should see something similar to this:
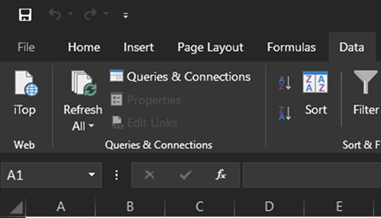
When you click on the custom menu, the “External Data From Web” wizard should appear:

Reporting with Excel
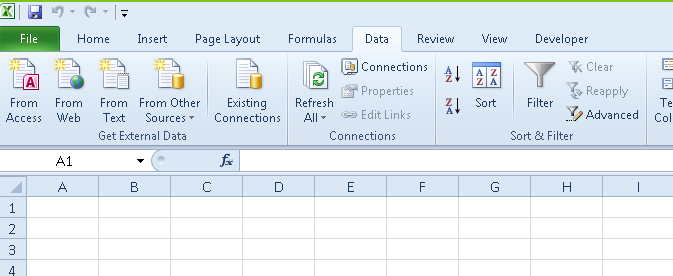
To use this query in Excel, click on the button From Web in the Excel tab Data
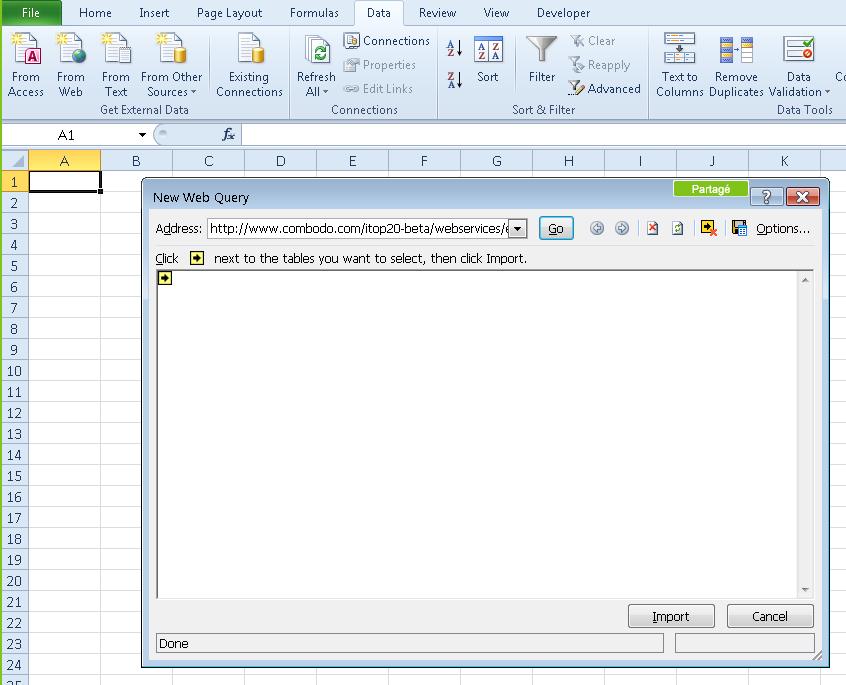
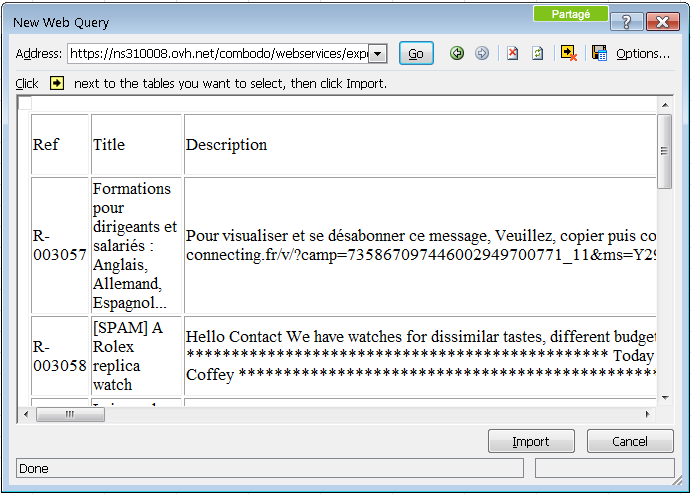
A window is displayed to enter the URL to be called:
Enter the URL provided by the iTop administrator in the Address part and click on Go.
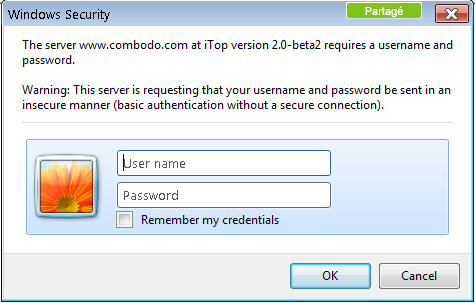
The iTop authentication window is displayed. Enter your user account and your password:
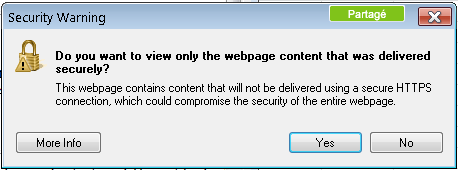
Click on Ok: if you are prompt by security popup windows.
The New Web Query is updated with the list of columns to be imported:
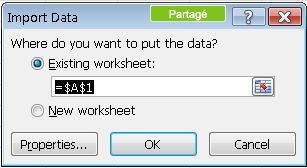
Click the Import button. Excel asks you where you want to insert the data:
If your query contains parameters, Excel will open several successive windows to enter them. Be careful, date parameters only support the format yyyy-mm-dd.
Click the OK button and Excel displays the result of the query. The language used for the display of columns corresponds to the default language of your login in iTop.
To refresh the data, click on the Refresh All button in the Data tab of Excel:
You can use as many iTop queries as you want and use the results to create graphs or charts dynamically using standard Excel features.
With Personal Token
Let's assume you have created a Web Query in iTop, which can be called with this URL
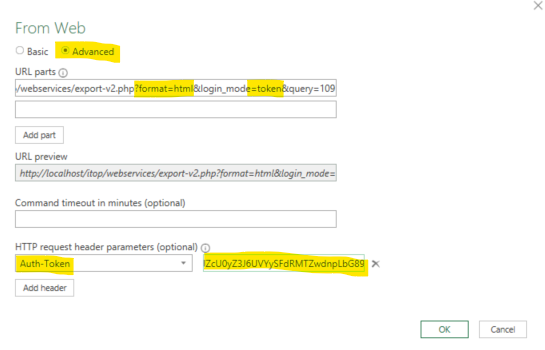
http://localhost/itop/webservices/export-v2.php?format=html&login_mode=token&query=109
format can be
html, csv (spreadsheet can fails with
some excel version).Cautious
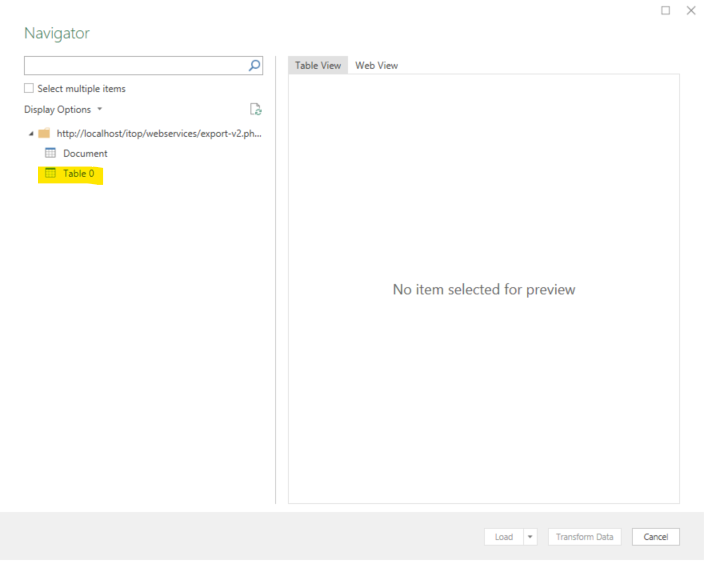
Open Excel, and import with the new wizard mode
Let's assume that you have created a Personal Token in iTop and have copied the token.
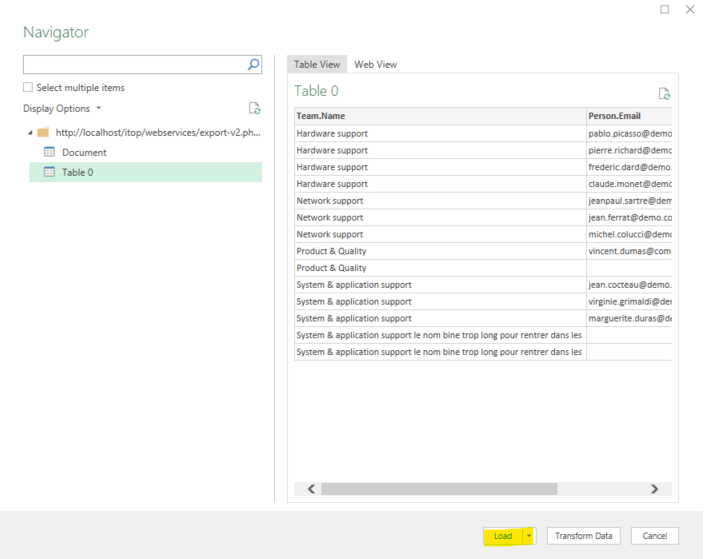
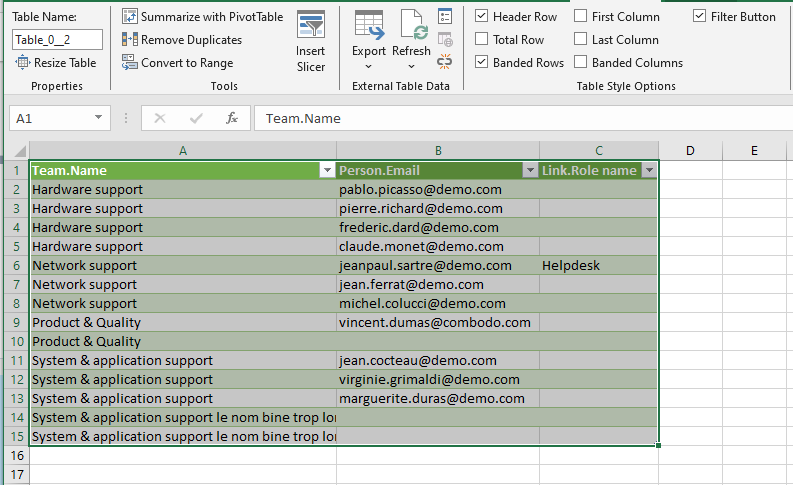
In the new pop-up window with Navigator
Reports in LibreOffice
The software's default configuration is compatible with iTop: there's nothing to change.
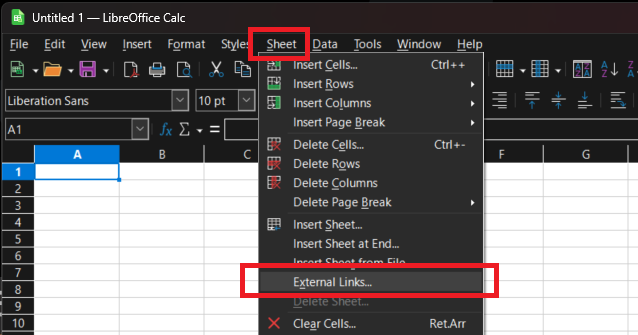
To use an iTop query in LibreOffice Calc, select the cell where you want to insert the data. Then, click on the menu Sheet > External links… or the button External links in the tab Data
The External data window is displayed to enter the URL to be called:
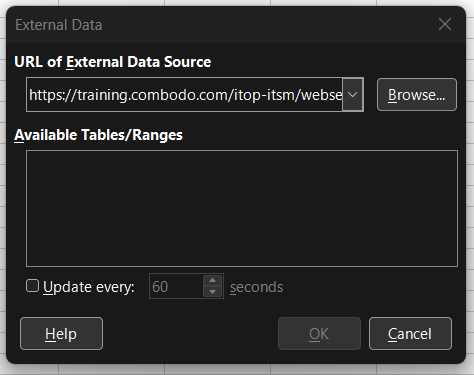
Enter the URL provided by the iTop administrator in the URL of External Data Source part and press the Enter key on your keyboard.
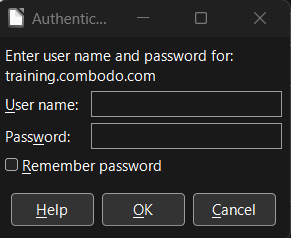
The iTop authentication window is displayed. Enter your user account and your password:
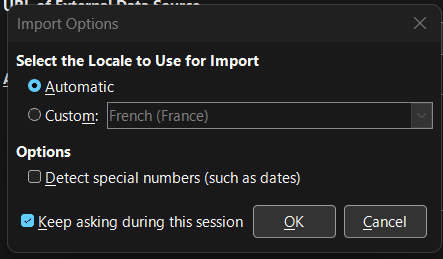
You can then adjust the import options. If you don't have special needs, the defaults are ok:
The Available Tables/Ranges is updated with the list of tables to be imported. To get just one table, select HTML_1 :
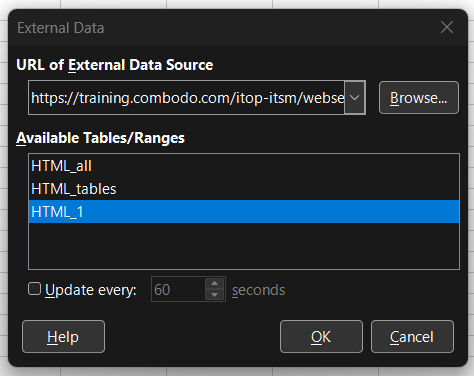
Click the OK button and LibreOffice Calc displays the result of the query. The language used for the display of columns corresponds to the default language of your login in iTop.
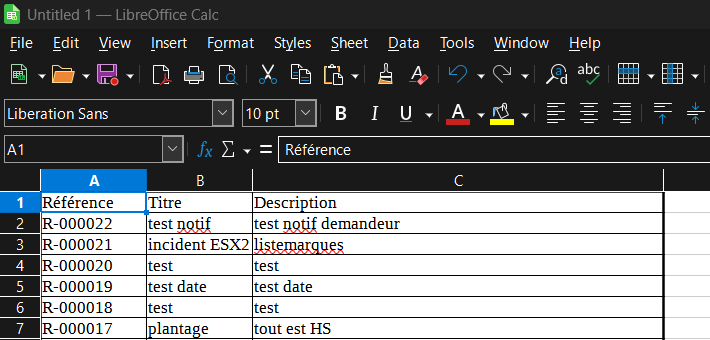
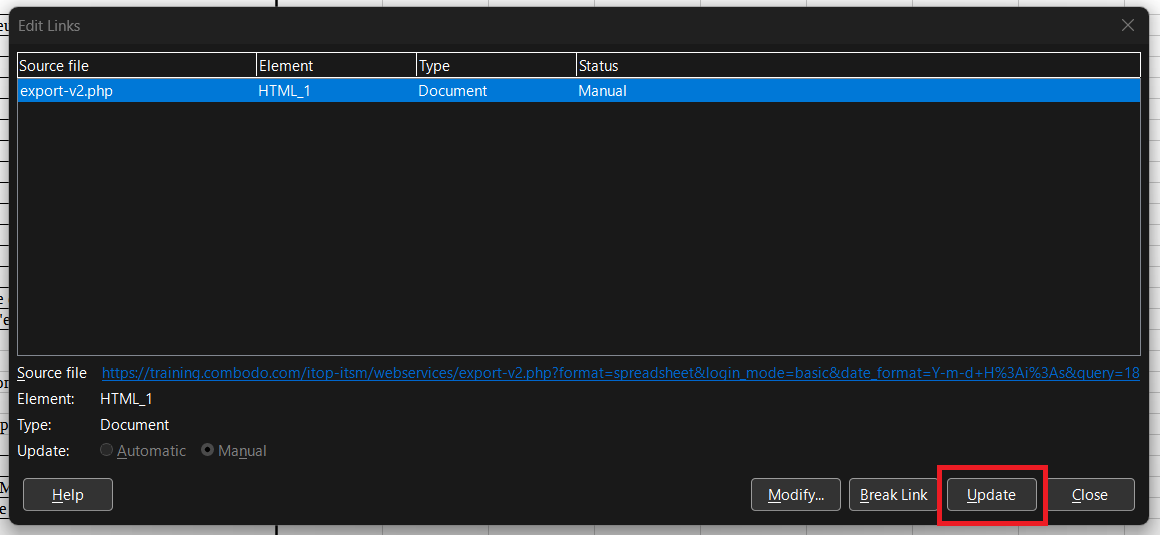
To refresh the data, click on the menu Edit > Links to External files…, and then the Update button on the Edit Links window.

You can use as many iTop queries as you want and use the results to create graphs or charts dynamically using standard LibreOffice Calc features.
Reports in WPS Office
Please, follow the howto on the WPS Office editor's web site.
To use an iTop query in WPS Office, go to the Data tab, then click on the button Import Data > From Web….
To update an iTop query in WPS Office, go to the Data tab, then click on the button Refresh All.
Reports in OnlyOffice
It seems that OnlyOffice do not support web queries. You can go to the reference documentation on the editor's website, to check if there are changes in newer versions.


