iTop Main Screen
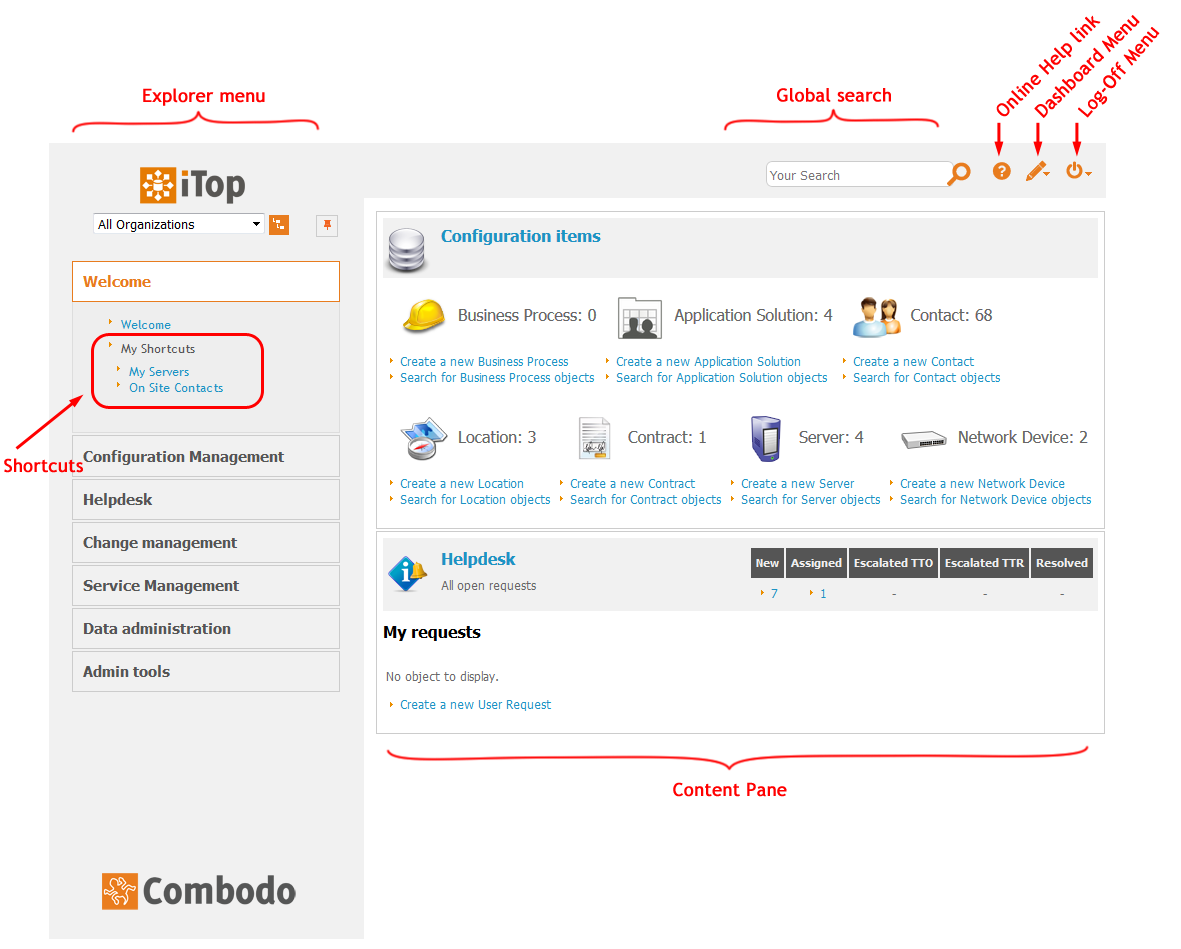
The picture below shows the main screen of the application, it contains all the standard elements of the iTop screens:
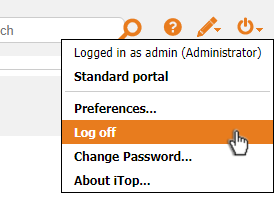
The Log-Off menu
At the top-right of the page, a popup menu is accessible by
clicking on the On/off icon: ![]()
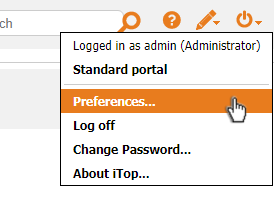
The first line of the popup displays the name of the user currently logged-in. If this user is an administrator for the application, this is also shown on this line.
Other lines in bold typeface are Actions. Clicking on them will launch the action corresponding to this menu item.
-
Standard Portal is proposed if the user is allowed to switch from the Console to the Portal.
-
Preferences is for managing your user preferences in the application (language, favorite organizations, etc.)
-
Log off is for terminating your session with iTop
-
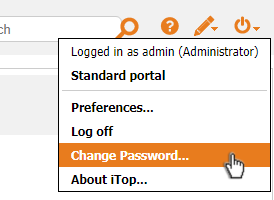
Change Password is for changing your iTop password
Changing your password
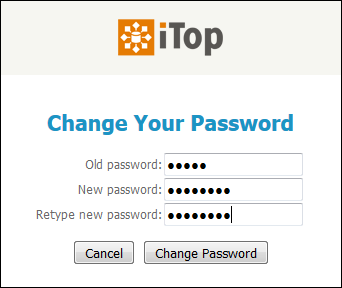
Click on the Change Password menu item, to display the change password form:
Type the Old password in the Old password field. Next, in the New password field below, type the new password. Retype the new password in the third field. When this is done, click Change Password to validate your change.
Disconnecting from iTop
Managing your Preferences
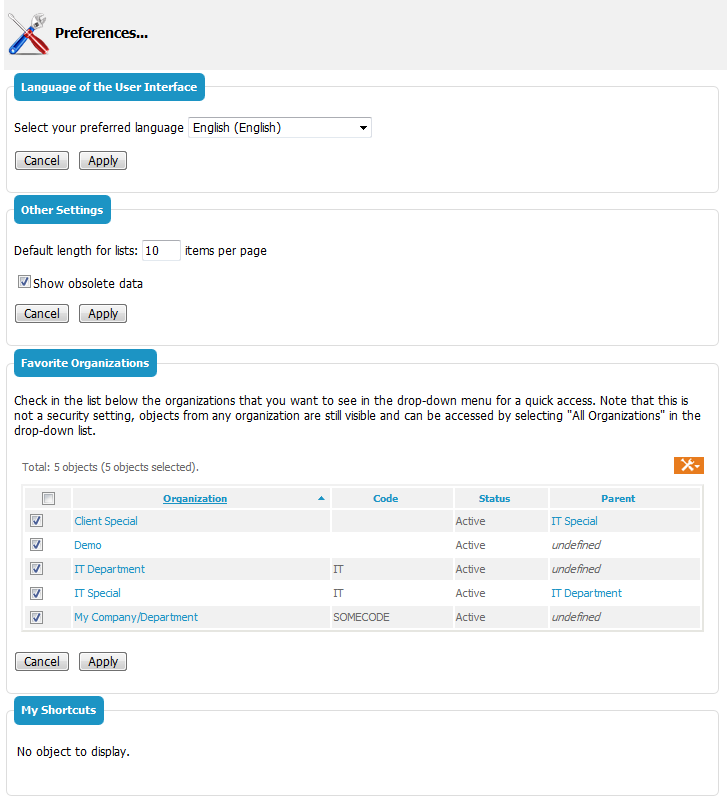
The Preferences menu allows each user to configure:
-
The language for the iTop user interface
-
The default length for displaying any list of search results
-
The option Show obsolete data unchecked by default, allow to display obsolete objects in drop-down lists and search results
-
The list of favorite Organizations to be displayed in the context menu
-
The Personal shortcuts created by the user
Language
To change the language of the user interface, select the desired language from the drop-down list and click on Apply.
Other settings
The Default length for lists is used to limit the display size of the lists of objects; for example, when performing a search. If the number of elements in the list exceeds this value, the list will display the objects by page. Each page is configured by default to display the default length number of objects. Displaying more objects per page may be more convenient but will slow down the display.
This length is also used to limit the history of CSV imports (truncated view).
To modify the default value, change the number then click Apply.
Favorite organizations
In large companies, not all users are interested by all organizations documented in iTop (for example if a given user works only for a given set of customers). This setting let each user tailor the list of organizations that appear in the context menu at the top-left of their iTop pages, in order to ease the navigation in the application.
Shortcuts
Use this to rename or delete user-created shortcuts. (See User shortcuts for how to create shortcuts). The shortcuts appear in the main menu immediately below the Welcome menu. To rename a shortcut, check the checkbox in front of its name and click on Rename. To delete shortcuts, check the checkboxes in front of their name and click on Delete (A popup confirmation message is displayed).
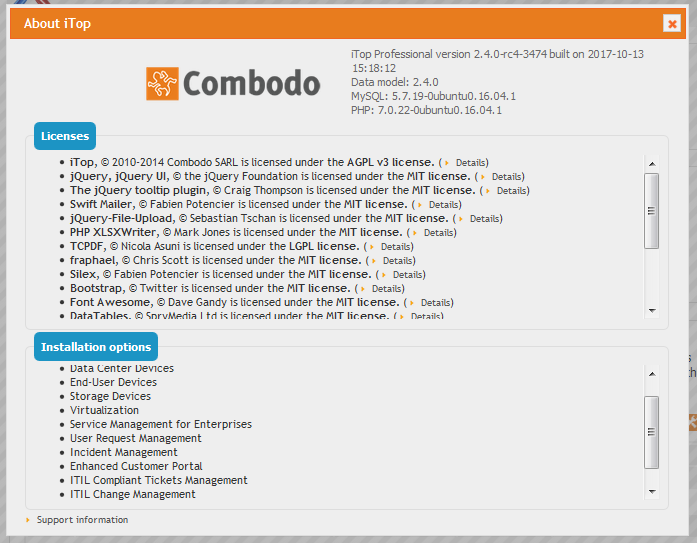
About iTop
Since 2.4 the second part of this screen displays your
Installation options which have been selected during
the last Setup by the Administrator.
The Explorer Menu
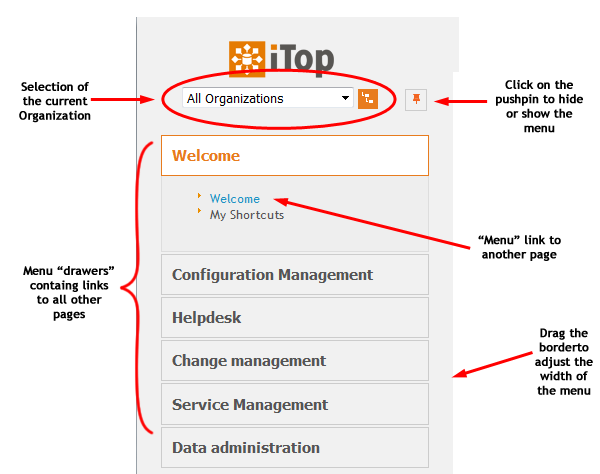
On the left of the screen, a resizable pane contains the Explorer Menu for the application. This is the entry point to all the iTop features.
In order to optimize the space on screen, the size of the menu may be adjusted by dragging its right border. You can also completely hide the menu by clicking on the pushpin icon at the top-right. Once the menu is hidden, move the cursor of the mouse next to the left border of the page to make the menu appear again. Click on the pushpin again to pin it on the page, or let the menu disappear again when you move the mouse out of it.
Organizations
Many of the objects managed in iTop belong to an Organization. Organizations are the main means to arrange objects in iTop. For example the access control is based on Organizations: a given user may be allowed to access only a given set of Organizations. Moreover the Organizations Selection menu at the top of the menu allows the end-user to limit the current display to the context of the given Organization. Once an Organization is selected, this “context” information is kept from page to page. To reset the context and display again all iTop objects, simply select “All Organizations” in the drop-down list.
It is sometimes desirable to shorten the list of Organizations displayed in the drop-down box. For instance, you may need to view only your customers of interest. Refer to Managing your preferences for more information about how to configure the list.
Menu Drawers
The main menu organizes the iTop features into several drawers, one per process (or per area of interest). Click on the Title of a drawer to toggle the display of its contents. Only one drawer is open at a time.
Inside each drawer, a number of links give access to the various features of iTop.

