Creating new Profiles
This document explains, step by step, how to create your own iTop module in order to create new profiles to grant access to the iTop application.
Goals of this tutorial
In this step-by-step tutorial you will learn to:
-
create your own extension module for iTop 2.0
-
define new profiles for iTop
-
on-board the new profiles by running the setup again
For the purpose of this tutorial we will create two new profiles:
-
A complete read-only profile, which grants the users the rights to browse through the application, but not to change anything in iTop
-
A read-only profile similar to the “Portal user” profile which grants the users enough rights to browse through the normal iTop application in read-only mode for most classes but also to use the Portal for submitting User Requests.
What you will need
-
iTop installed on a development machine, on which you can easily access/edit the files.
Customization process
The customization process is the following:
-
Install a development instance of iTop. It is always better not to experiment in production !!
-
Install the toolkit to assist you in the customization
-
Create a new (empty) module using the module creation wizard
-
Copy this new module to the
extensionsfolder on iTop and run the setup again to install the empty module -
Modify the module in
extensionsand use the toolkit to check your customizations -
Run the setup again to create the new profile(s)
Repeat the last two points until you are satisfied with your
customization. When you are done, your new module is ready to be
deployed. Copy the module folder in the extensions
directory on your production iTop instance and run the setup to
install it.
Step by step tutorial
Create your customization module
Use the module creation wizard. Fill the form with the following values:
| Label | Value | Remarks |
|---|---|---|
| Module name | sample-add-profile | Names starting with itop- and
combodo- are reserved for use by Combodo. It is
recommended not to put spaces or accentuated characters in the name
of the module. Two modules with the same name cannot co-exist in
the same iTop instance. |
| Module Label | Add Profile Sample | This label will be displayed in the setup wizard. Localized characters and spaces are allowed |
| Module Version | 1.0.0 | The convention is to use a 3 digits numbering scheme: X.Y.Z |
| Category | business | Modules that provide modifications to the data model should be in the category 'business' |
| Dependencies | itop-profiles-itil/1.0.0 | Our customization module depends on the modules: iTop Profiles ITIL since we will be using the groups defined in this module. Note that this module retained the version 1.0.0 even in iTop 2.0 !! |
Click Generate ! to download the empty module as a zip file.
Install the empty module
Expand the content of the zip into the extensions
folder of your development iTop instance. You should now have a
folder named sample-profile-class inside the
extensions folder. this folder contains the following
files:
-
datamodel.sample-add-profile.xml
-
module.sample-add-profile.php
-
en.dict.sample-add-profile.php
-
model.sample-add-profile.php
Make sure that the file
conf/production/config-itop.php is writable for the
web server (on Windows: right click to display the file properties
and uncheck the read-only flag; on Linux change the rights of the
file), then launch the iTop installation by pointing your browser
to http://your_itop/setup/
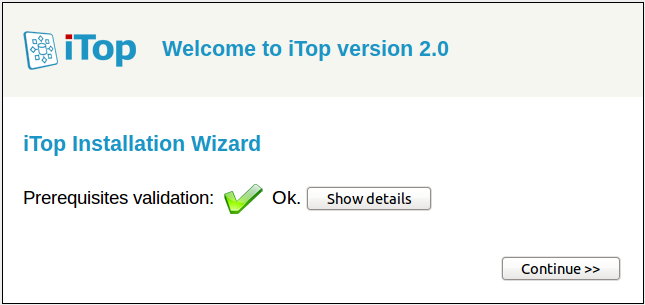
Click “Continue »” to start the re-installation.
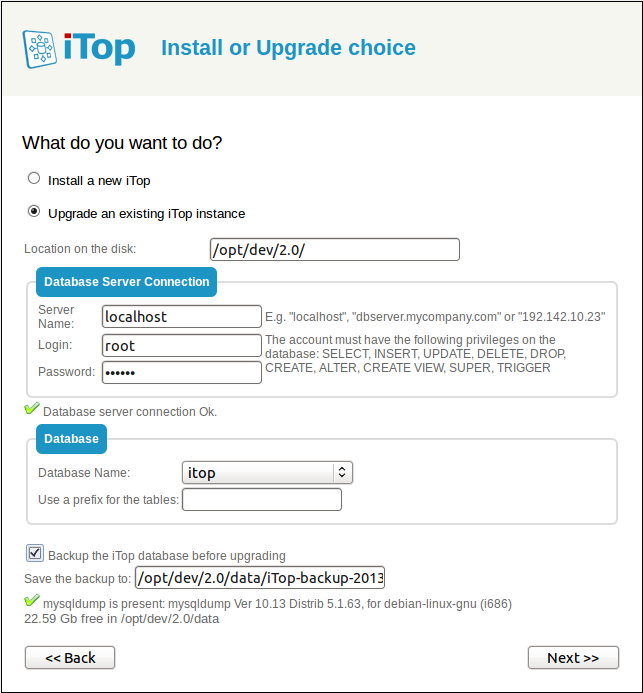
Make sure that “Update an existing instance” is selected before clicking “Next »”.
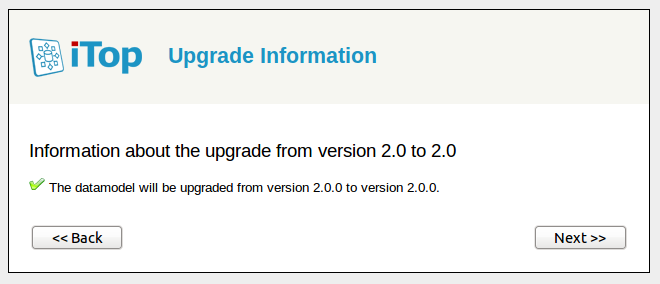
Continue to the next steps of the wizard…
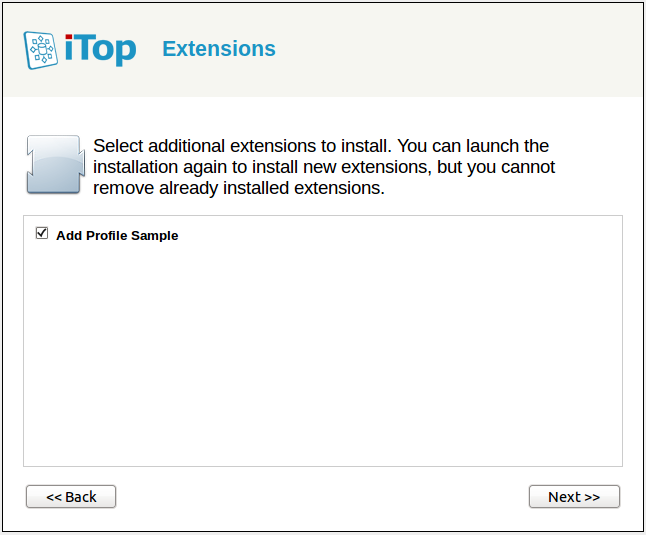
Your custom module should appear in the list of “Extensions”. If this is not the case, check that the module files have been copied in the proper location and that the web server has enough rights to read them.
Select your custom module before clicking “Next »” and complete the installation.
Declare the new Profiles
Using you favorite text editor, open the file
datamodel.sample-add-profile.xml.
Inside the user_rights tag, add the following piece
of XML:
     <profiles>
      <profile id="50" _delta="define">
        <name>Read-Only Except Requests</name>
        <description>Users with this profile are allowed to browse through all objects in the application and to create/modify user requests (either through the portal or in the normal application)</description>
        <groups>
          <group id="Portal user - write">
            <actions>
              <action xsi:type="write">allow</action>
            </actions>
          </group>
          <group id="Portal user - delete">
            <actions>
              <action xsi:type="delete">allow</action>
            </actions>
          </group>
          <group id="class:UserRequest">
            <actions>
              <action id="ev_close" xsi:type="stimulus">allow</action>
            </actions>
          </group>
          <group id="*">
            <actions>
              <action xsi:type="read">allow</action>
              <action xsi:type="bulk read">allow</action>
            </actions>
          </group>
        </groups>
      </profile>
      <profile id="51" _delta="define">
        <name>Read-Only No Portal Access</name>
        <description>Users with this profile are allowed to browse through all objects in the application but not to modify anything (event through the portal)</description>
        <groups>
          <group id="*">
            <actions>
              <action xsi:type="read">allow</action>
              <action xsi:type="bulk read">allow</action>
            </actions>
          </group>
        </groups>
      </profile>
    </profiles>
This instructs iTop to define two new profiles.
-
The first profile (numbered id=“50”) is actually a clone of the “Portal User” profile. The only difference is that “Portal User” is a conventional name for a profile. Any user which has the “Portal User” profile is automatically directed to the portal interface of iTop. Since our new profile is named “Read-Only Except Requests”, users with this profile are allowed to navigate through the standard user interface of iTop.
-
The second profile (numbered id=“51”) is a pure read-only profile: it allows only to browse through iTop but not to change anything.
The profiles are defined by accumulating rights on a given set
of classes - listed in “groups”. By convention the group with
id=“*” means “any class”. The other groups used in this example are
the groups already defined in the module “itop-profiles-itil” (you
can see their definition in the file
datamodel.itop-profiles-itil.xml).
For example the group “Portal user - write” is defined as follows:
      <group id="Portal user - write" _delta="define">
        <classes>
          <class id="FileDoc"/>
          <class id="lnkTicketToDoc"/>
          <class id="UserRequest"/>
        </classes>
This group is used to grant rights on the classes: FileDoc (a file document), UserRequest (a user request ticket) and also lnkTicketToDoc (the n:n relation between a Document and a Ticket). In order to let the end-user create a User Request ticket (and attach/detach documents to the ticket), the profile “Read-Only Except Requests” must grant write access to all classes in this group (The read access is granted by the rule on the “*” group).
Since we don't need to redefine any group of classes, the
datamodel.add-profile-sample.xml file should contain
only the following:
- datamodel.sample-add-profile.xml
-
<?xml version="1.0" encoding="UTF-8"?>
<itop_design xmlns:xsi="http://www.w3.org/2001/XMLSchema-instance" version="1.0">
  <classes/>
  <menus/>
  <user_rights>
     <profiles>
      <profile id="50" _delta="define">
        <name>Read-Only Except Requests</name>
        <description>Users with this profile are allowed to browse through all objects in the application and to create/modify user requests (either through the portal or in the normal application)</description>
        <groups>
          <group id="Portal user - write">
            <actions>
              <action xsi:type="write">allow</action>
            </actions>
          </group>
          <group id="Portal user - delete">
            <actions>
              <action xsi:type="delete">allow</action>
            </actions>
          </group>
          <group id="class:UserRequest">
            <actions>
              <action id="ev_close" xsi:type="stimulus">allow</action>
            </actions>
          </group>
          <group id="*">
            <actions>
              <action xsi:type="read">allow</action>
              <action xsi:type="bulk read">allow</action>
            </actions>
          </group>
        </groups>
      </profile>
      <profile id="51" _delta="define">
        <name>Read-Only No Portal Access</name>
        <description>Users with this profile are allowed to browse through all objects in the application but not to modify anything (event through the portal)</description>
        <groups>
          <group id="*">
            <actions>
              <action xsi:type="read">allow</action>
              <action xsi:type="bulk read">allow</action>
            </actions>
          </group>
        </groups>
      </profile>
    </profiles>
  </user_rights>
</itop_design>
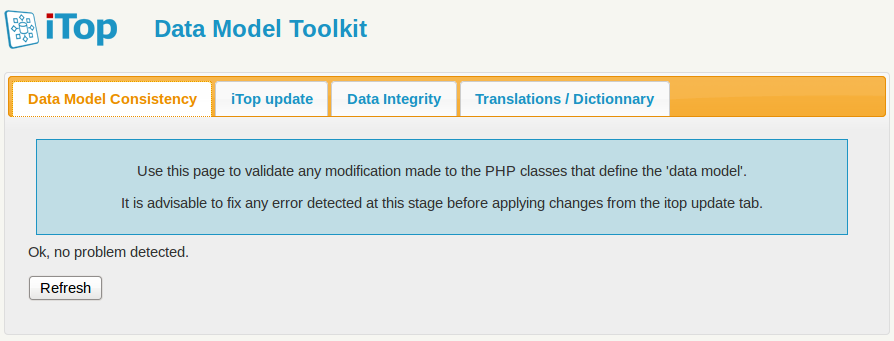
Check your modification by running the toolkit. Point your browser to http://your_itop/toolkit.
If any error is reported at this stage, fix it by editing the XML file and check again your modifications by clicking on the “Refresh” button in the toolkit page.
On-board the new Profiles
When you are done with the modifications, you need to run the setup again in order to onboard the new profiles.
Make sure that the file
conf/production/config-itop.php is writable for the
web server (on Windows: right click to display the file properties
and uncheck the read-only flag; on Linux change the rights of the
file), then launch the iTop installation by pointing your browser
to http://your_itop/setup/
Click “Continue »” to start the re-installation.
Make sure that “Update an existing instance” is selected before clicking “Next »”.
Continue to the next steps of the wizard…
Your custom module should appear in the list of “Extensions”, it should already be checked and greyed out (meaning that you cannot deinstall it). Just press “Next »” and complete the installation.
Final Customization Module
You can download the complete customization module by clicking on the link below:
Next Steps
To deploy your customization to another iTop server, simply copy
the folder “sample-add-profile” to the extensions
folder of iTop and run the setup again.

